A Brief Note on BMP180 Sensor
We have already seen about BMP180 Sensor in Arduino BMP180 Tutorial. But let us recap some important info about the sensor. The BMP180 is a Digital Barometric Pressure Sensor from Bosch. It is an ultra-low power device based on piezo resistive MEMS device. It can measure the atmospheric pressure in the range of 300 hPa to 1100 hPa. In addition to measuring pressure, the BMP180 Sensor can also measure Temperature in the range of 00C to 650C. Since BMP180 measures the atmospheric pressure, you can easily deduct the altitude of the point (as they both are related).
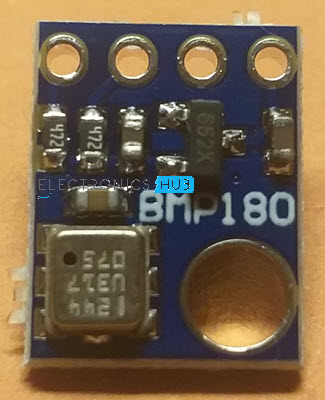
The actual BMP180 Sensor is a tiny device with dimensions 3.6mm x 3.8mm. It is available in 7 pin LGA package and communicates with a Microcontroller either through I2C or SPI (only one is possible in the final sensor). An important point about sensors is its calibration. A sensor needs to be properly calibrated to produce acceptable results. Fortunately, all the Bosch BMP180 Barometric Pressure Sensors are factory calibrated so that they are ready to use. Many third-party module and sensor manufacturers took the tiny BMP180 Sensor and designed a small Module, which is perfectly suitable for Arduino and other DIY Projects. Most of the modules available today use I2C Communication. [ESP32 Projects for Beginners]
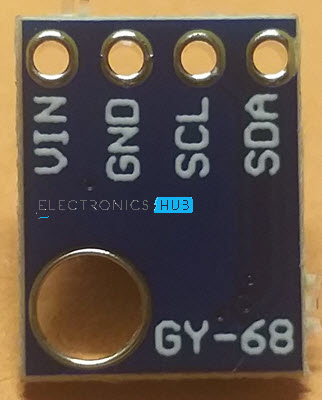
Pin Diagram of BMP180
The following image shows the Pins of BMP180 Sensor. The module has labelled the pins on the back.
As you can see, there are four pins on the BMP180 Module:
VIN GND SCL SDA
ESP32 BMP180 Interface
Now that we have seen a little bit about BMP180 Pressure and Temperature Sensor, let us now proceed with understanding how to interface BMP180 with ESP32. The first thing you have to remember is that BMP180 is a Digital Sensor. The next important thing to remember is that the BMP180 Sensor uses I2C bus for communication with a microcontroller. If you remember the Pinout of ESP32, the default I2C pins of ESP32 are GPIO 21 (SDA) and GPIO 22 (SCL). They are labelled as D21 and D22 respectively on the ESP32 DevKit Development Board. So, we have to use these pins to interact with BMP180 Sensor.
Components Required
ESP32 DevKit Development Board BMP180 Pressure and Temperature Sensor (Module) 16×2 LCD PCF8574 I2C LCD Module Breadboard Connecting Wires Micro USB Cable
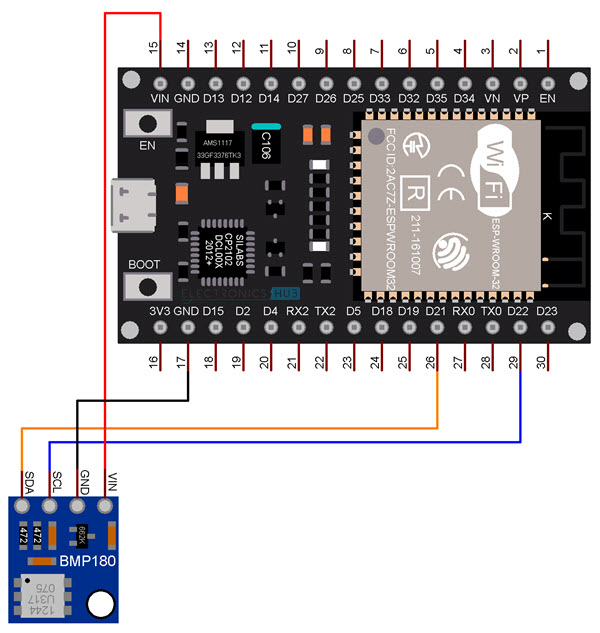
Circuit Diagram
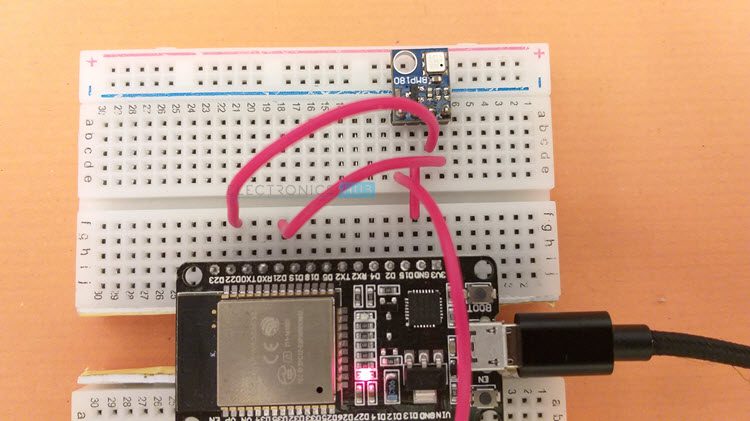
The following image shows the connections between ESP32 and BMP180. The BMP180 Module has on-board 3.3V regulator. So, you can power the board with 5V. Connect VIN of BMP180 to VIN of ESP32 Board. Also connect the GND pin of BMP180 to any GND pin of ESP32. Now, coming to the I2C Pins, connect SDA to GPIO 21 of ESP32 (which is marked as D21 on Board) and SCL to GPIO22 (which is marked as D22). This finishes all the connections.
Preparing Arduino IDE
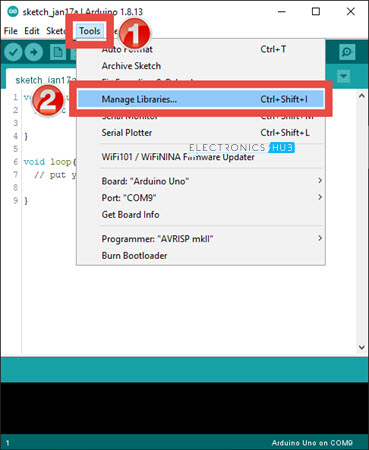
You need to download one library associated with BMP180 Sensor so that ESP32 will properly communicate with the Sensor. Go to Tools -> Manage Libraries… in Arduino IDE.
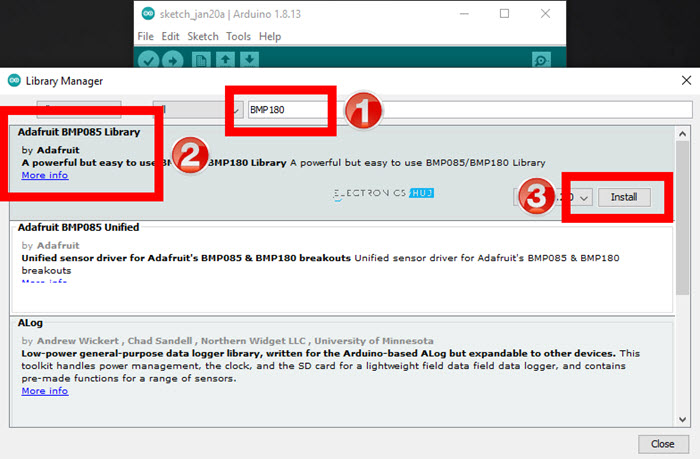
In the search bar, enter ‘bmp180’ and install ‘Adafruit BMP085 Library’ by Adafruit.
Displaying Pressure and Temperature on Serial Monitor
After making the proper connections and installing the necessary libraries as mentioned above, we will now see how to read the Pressure and Temperature data from BMP180 Sensor using ESP32 and display the result on the Serial Monitor.
Code
The BMP180 Sensor uses I2C bus for communication with the Microcontroller. I wrote a simple code which will initialize the BMP180 Sensor and reads the Pressure and Temperature data from the sensor. To view the result, I simply used the serial monitor to print the pressure values in hPa for and degree Celsius for temperature.
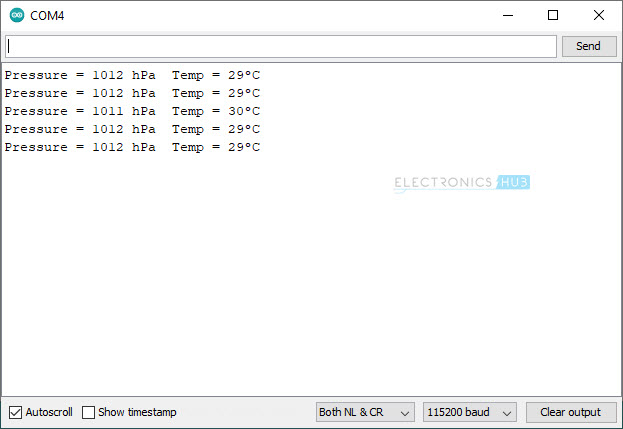
The following image shows the screenshot of the Serial Monitor, which is continuously printing the pressure and temperature reading every 3 seconds.
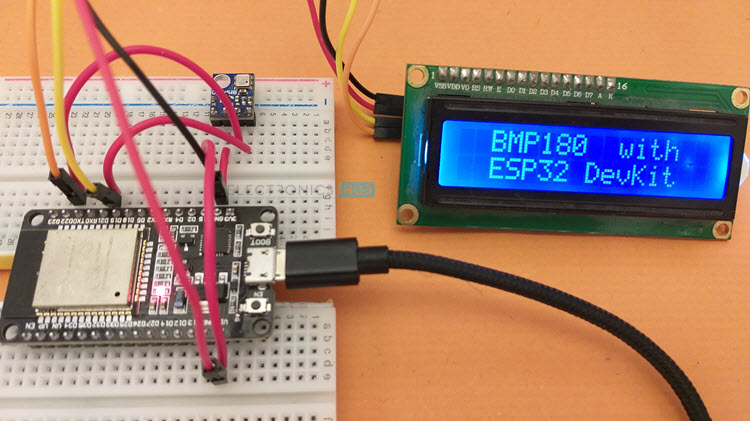
ESP32 BMP180 with I2C LCD
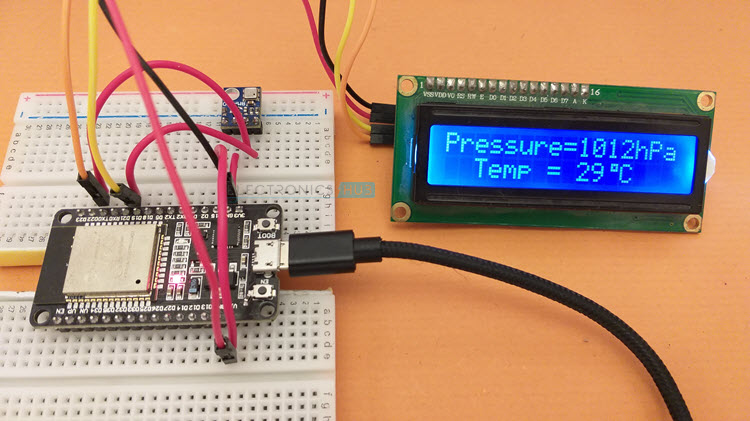
Displaying pressure and temperature data from BMP180 Sensor on Serial Monitor is useful just for testing the connections and the code itself. To build a practical “Embedded System” application, you have to use a display module of some kind (OLED, 16×2 Character LCD, Nokia 5110 LCD, graphical LCD etc.) to view the pressure and temperature readings. I used a regular 16×2 Character LCD Display Module in combination with PCF8574 I2C LCD Module to display the pressure and temperature readings from ESP32 BMP180 Sensor Interface. I made a dedicated tutorial on how to use an I2C LCD with ESP32. Check out that tutorial for in-depth information. I also discussed the necessary libraries you have download to successfully connect I2C LCD with ESP32 in that tutorial. NOTE: I also explained how to get the Slave Address of I2C LCD Module in that tutorial. This step is very important.
Circuit Diagram
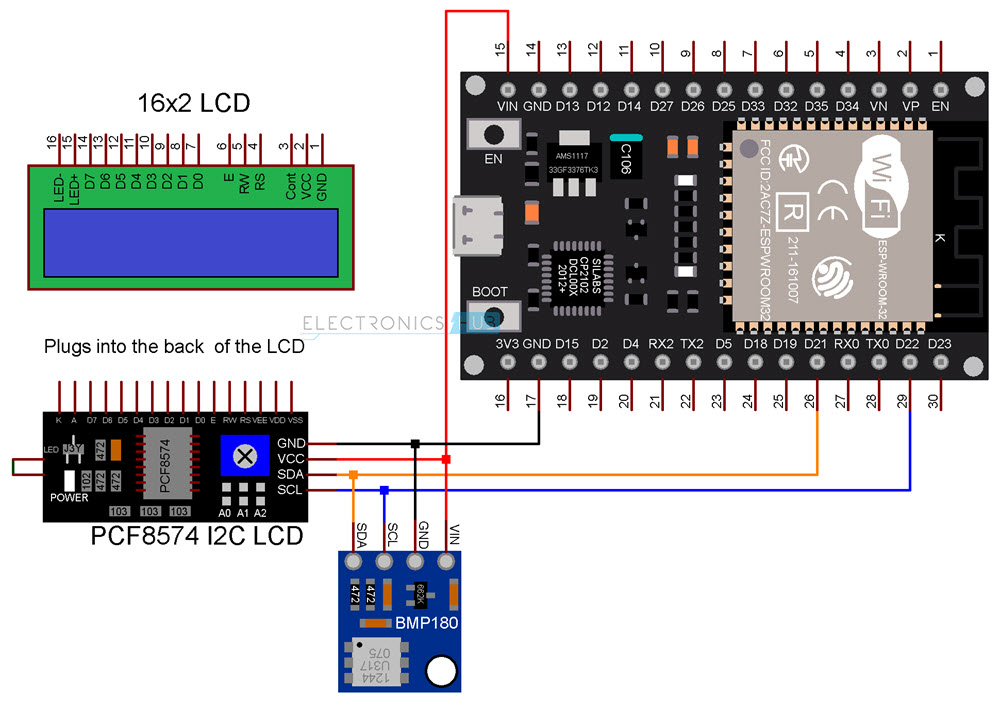
The additional components you require are a 16×2 LCD Display and an I2C LCD Module (based on PCF8574). Plug-in the I2C LCD Module at the back of the 16×2 LCD Display. The I2C LCD Module needs only four connections (two of them are for power and two are for data). All the necessary connections between ESP32 and I2C LCD Module as well as between ESP32 and BMP180 Pressure and Temperature Sensor are shown in the following circuit diagram.
Code
The code for ESP32 BMP180 Sensor Interface with I2C LCD is very simple. The initialization part of the sensor is similar to the previous code. Only the LCD related code is additionally added.
Conclusion
A complete beginner’s guide on interfacing BMP180 Pressure and Temperature Sensor with ESP32 is implemented here. You learned some basic information about BMP180 Sensor, how ESP32 BMP180 Sensor Interface works, necessary libraries for communicating with BMP180, how to display pressure and temperature data on Serial Output and also how to connect I2C LCD with ESP32 and display the pressure and temperature readings. As far as a Web based Pressure and Temperature Monitoring System using ESP32 and BMP180 Sensor is considered, I will update this page shortly with the code for Web Server. Comment * Name * Email * Website
Δ
![]()
![]()
![]()
![]()
![]()

