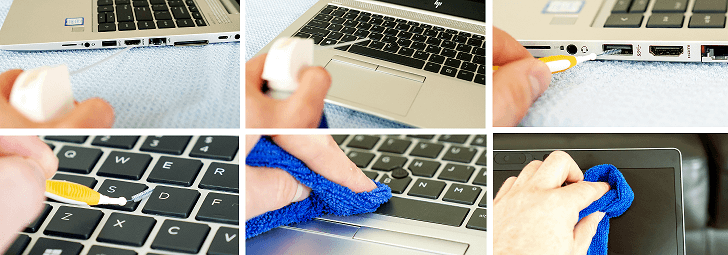
As you continue to use a dusty and greasy laptop, its keypad and screen also get affected. And due to its compact design, it becomes challenging to get over with it. This also makes your laptop perform slowly and over some time, it might become unusable or unstable. Apart from this, some other issues that may arise are quick draining of the battery while causing the fans to run at full speed. Through this post, we will let you know some of the best methods to make your laptop dust-free and use it to its full potential. So, if you want to know all about it, stay tuned and continue to read this post!
What Can You Do To Remove Dust from Laptop Without Compressed Air
The majority of laptops these days are not designed to be opened easily, which could be a daunting issue. If you have a desktop computer, you can seamlessly open it up and then pass a blow of compressed air to clean it up. The laptop can also be cleaned in the same way, if you can open it and get to the inside. Your laptop comes with single or multiple bottom panels which can be unscrewed to open. You can go through the user guide or check out the manual online to open your laptop to get inside. To do so, you first need to turn off your device and then remove the battery. Then, unscrew its panel to access the inside.
Properly Remove Dust from the Laptop
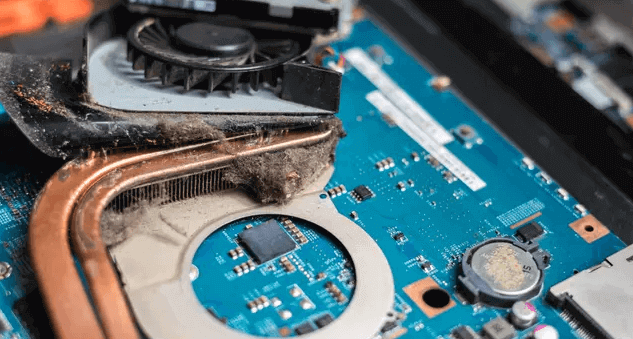
After accessing the inside of your laptop, you can remove dust from its components. When you do so, it starts to perform the way it’s meant to. Dust particles can be fine or flaky. You can remove dust flakes with the help of a hand blower or vacuum cleaner. But, the key is to go slow to prevent air pressure from damaging the fan.
Eliminate Dust Particles That Are Of Large Size
To get rid of large dust particles, start by turning your laptop off so that the fan doesn’t get damaged. After this, ensure that your laptop is not connected to the power, this is vital to prevent any accidents such as short circuits which might happen when you use a vacuum cleaner when the device is connected to the power. Also, keep all the screws away to prevent them from accidentally being sucked by the vacuum. When you use a vacuum cleaner, make use of the brush attachment to effortlessly remove dust. Additionally, the pipe makes it difficult to remove dust as it prevents it from driving along the base/surface. This can also be dangerous as the sensitive parts of your laptop can get damaged by the vacuum cleaner. After this, set your vacuum cleaner to a low setting while ensuring that the fan is not spinning. Then, try to keep it stable using a wire to avoid it from rotating. Lastly, don’t forget to take off dust from the bottom and corners.
Tackling Fine-Grained Dust
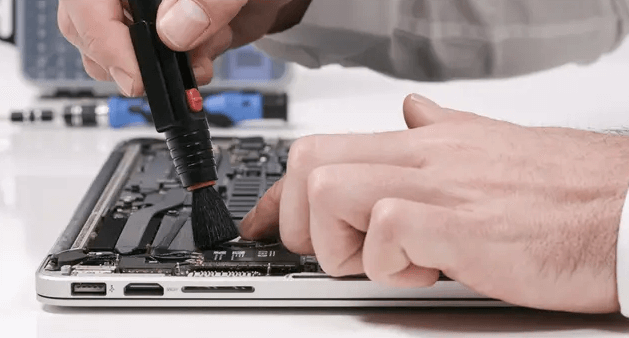
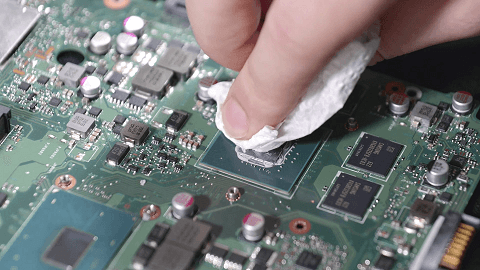
After getting rid of the flaky dust particles with a vacuum cleaner, it’s time to remove the fine dust particles. For this, you must remove every component including the cages of the hard drive. The best way to remove dust from circuit boards is with the help of a brush. You should use a brush with soft bristles and while you work with this device, patience is what you need. But, make sure to take all the careful measures to prevent damage to the tiny components.
Removing the Dust Stuck On The Laptop
A bush with medium to hard hardness is best suitable to remove stubborn dust particles from cooling fins and fans. You can remove the stick on dust by starting with removing the covers and then the fan so that you can easily access the components. There are many case fans that can be used to remove the blades from the drive. In such a case, you need to dip the dusty wings in warm water filled with a mild washing liquid. This will remove the deposits with ease, and then install everything after thoroughly drying.
Clean the Processor Cooler
To reach the processor cooler, remove the cooling block. At times, you need to do this by pulling the motherboard and after the same, you can start cleaning the device from the inside. You can even reach the hidden dust behind the mainboard. However, this cleaning process can take a lot of time and effort. In case you don’t have a laptop warranty, it is recommended to remove only the graphics card cooler, provided you are well versed with the steps you need to perform. Old graphic cards have thermal pads. When you detach the cooler, there are high chances for damage. In the worst scenario, the transfer of heat to the cooler from the video memory chip won’t work. There exists heat sinks with a simple design, which include the Radeon HD 5750. If you have a Geforce GTX 480, the radiator cleaning will take place without any need for tools.
Thermal Paste Renewal
When you detach the cooler from the graphic card or processor, you also need to replace the previous thermal paste with a new thermal interface. For the same, you need to first remove the old paste’s residue and then apply the new heat transfer agent. It is suggested to not over-apply it as it can leak from the gaps due to the cooler’s contact pressure.
Detangle Cable Chaos
Data cables and power cables are messily arranged. They are attached to the power supply and mainboard and then to the individual components of your laptop/computer. At times, these cables conceal heat sinks and fans get stuck to them while hindering airflow. But, this chaos of cables can be prevented with cable ties. However, you must ensure that all the cables are neatly arranged and secured. They should not cause any problem to the air circulation.
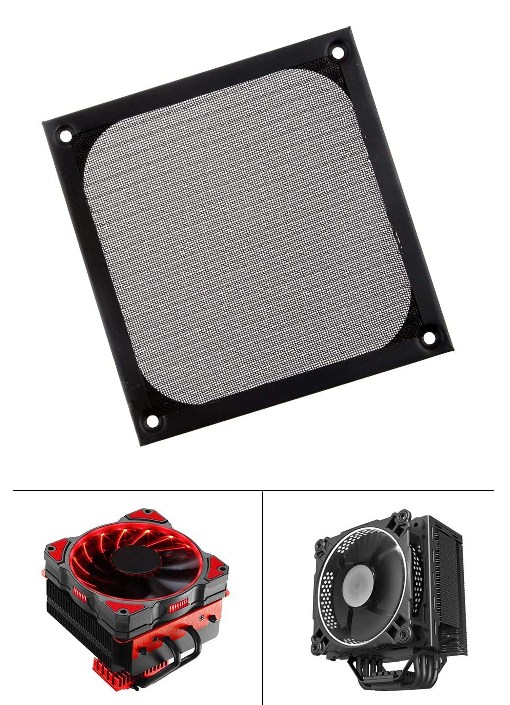
Dust Filter Mounting
To keep the cleaning process simple, you can opt for this easy solution. Protect your fans with dust protection filters. They can be mounted on the fans and prevent dust from accumulating. But, they call for regular washing or cleaning for them to work properly.
Conclusion:
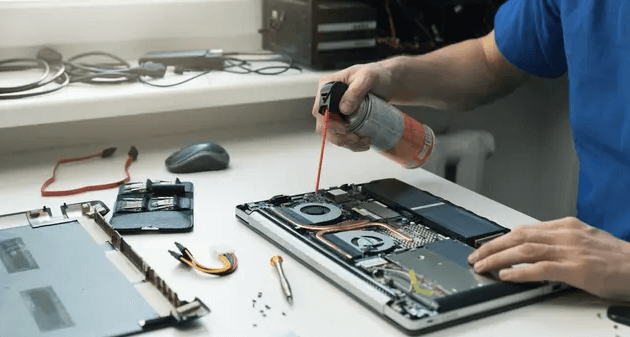
It is always a good idea to keep your laptop maintained by removing dust now and then. When your laptop is dust-free, it functions optimally and no overheating takes place. Also, if you mainly use your laptop for playing games and other such activities, there are high chances for your device to heat up instantly due to its more operability. You can think of removing dust with compressed air by switching off your device. Besides, you must use only a vacuum cleaner on a low setting to perform this activity. Comment * Name * Email * Website
Δ
![]()
![]()
![]()
![]()
![]()

