After understanding about the basics of a Reed Switch, I will proceed to Interfacing a Reed Switch with Arduino and configure it as an Input Device i.e. read the status of the switch and turn ON or OFF an LED.
A Brief Note on Reed Switch
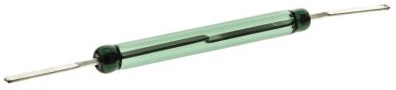
Reed Switch is a type of electrical switch that can be controlled with a magnetic field i.e. it is a magnetically operated switch. Internally, a Reed Switch consists of a pair of ferromagnetic metal contacts or reeds. Based on the presence or absence of a magnetic field, the Reed Switch contacts will be either close or open. The following image shows a simple reed switch with its internal connections.
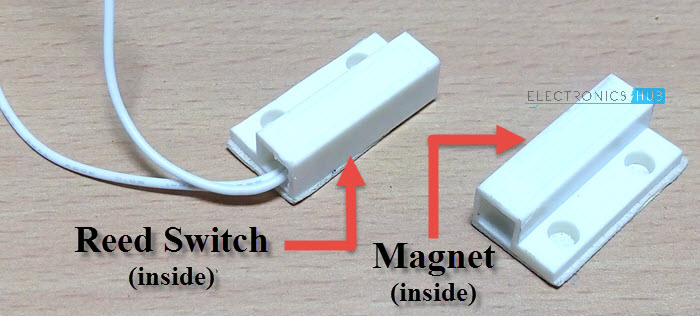
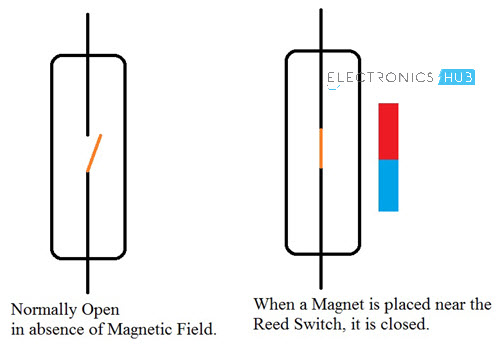
Depending on the construction of the Reed Switch, the contacts inside the switch can be either Normally Open or Normally Closed. In case of Normally Open type Reed Switch, usually the contacts will be in open state. Whenever a magnetic field comes near the switch, the contacts will be closed. Based on this, you can easily understand how a Normally Closed type Reed Switch works. The reed switch used in this project is of Normally Open Type. The following image shows the Reed Switch enclosed in a plastic housing along with a magnet (which is also enclosed in a protective housing).
In the image, the part on the left with wires coming out consists of the Reed Switch whereas the part on the right consists of a Magnet.
How a Reed Switch Works?
The working of the Reed Switch is very simple. Since I have a Normally Open type Reed Switch, the working and the all the further implementations will be associated to this type only.
When a magnetic field is present near the Reed Switch, the contacts, which are made up of ferromagnetic material, will be pulled together, thus closing the switch. In the absence of any magnetic field, the switch stays open. Related Project on Reed Switch – Automatic Washroom Light Switch
Testing a Reed Switch
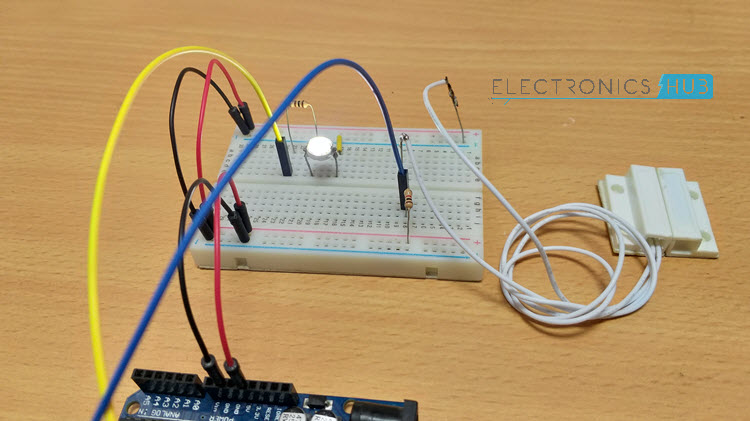
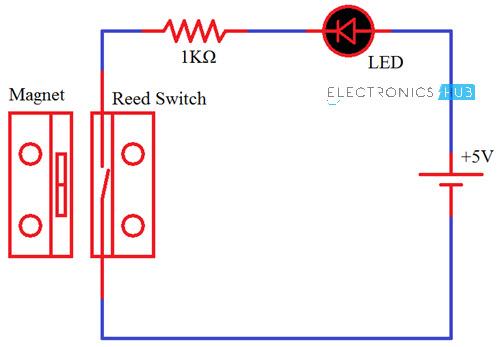
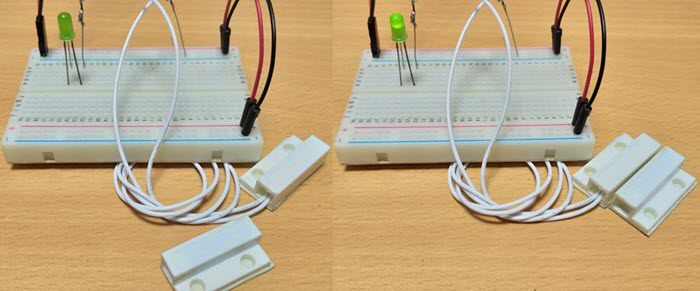
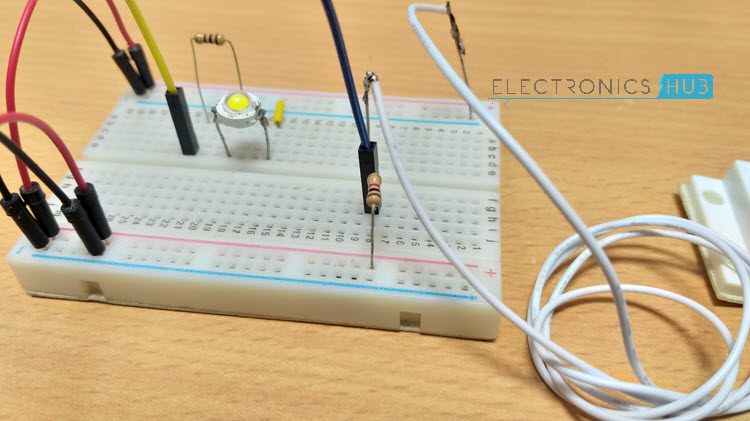
I have designed a simple test circuit to check the functionality of the Reed Switch. The following image shows a simple connection consisting of a Reed Switch, an LED, a resistor and a Power Supply.
When the magnet is kept away from the Reed Switch, it stays open and the LED will not be turned ON. But when the magnet is moved near the Reed Switch, the contact gets closed and the LED will be turned ON.
How to Connect Reed Switch with Arduino?
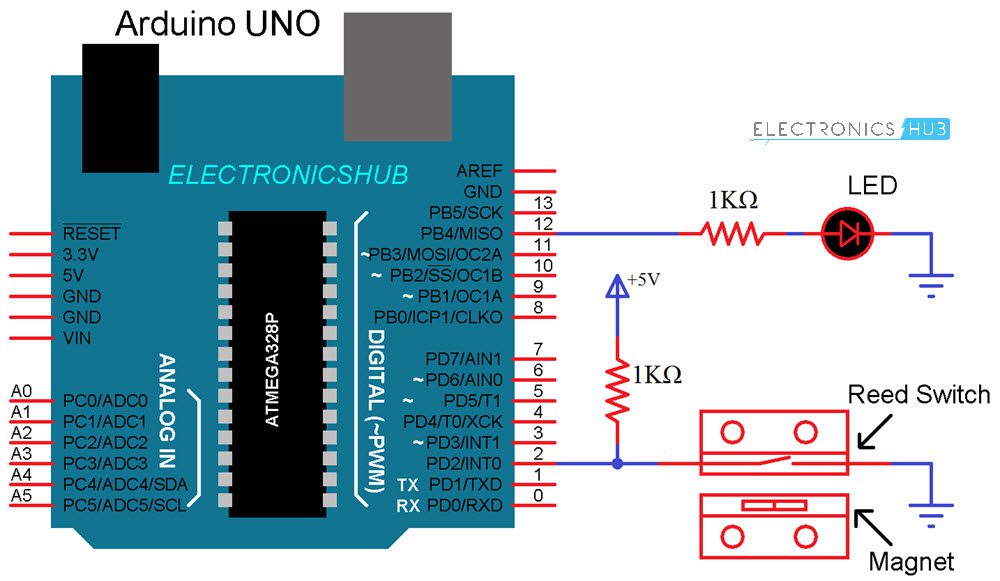
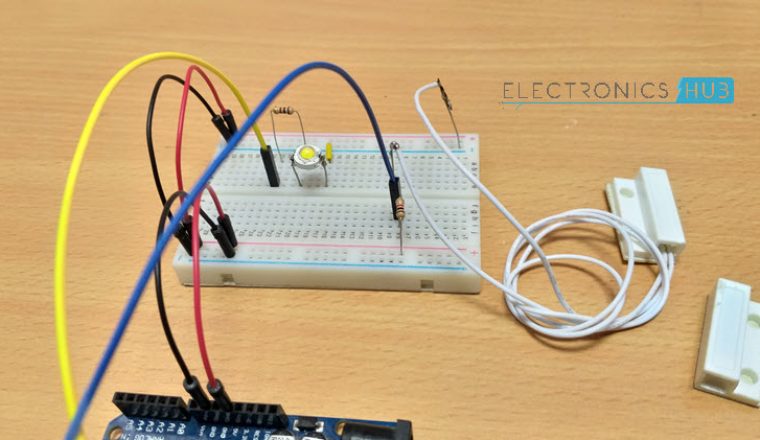
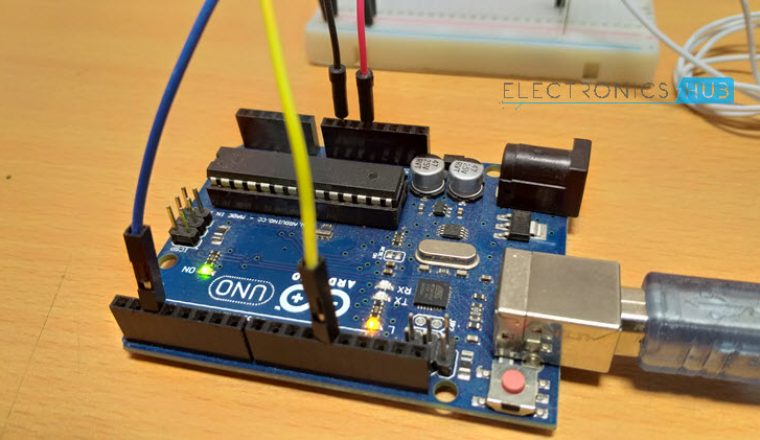
Connecting Reed Switch with Arduino is very simple. I have designed a simple circuit in which the Reed Switch is connected to Arduino as an Input device. If you are familiar with connecting a Push Button with Arduino, then follow the same step for connecting Reed Switch with Arduino. Connect one end of the Reed Switch to a Digital I/O Pin of the Arduino (which is configured as an Input) and the other end is connected GND. Also, the Arduino Pin (to which the Reed Switch is connected) is pulled HIGH with the help of a Pull-up Resistor.
This means that, the Arduino will always read the Input on this pin as HIGH. Whenever the Reed Switch gets activated (when a magnet is placed nearby), the Input pin of the Arduino changes its state to LOW. Based on the status of the switch (which Arduino reads continuously), an LED connected to the Arduino UNO will be activated.
Circuit Diagram of Connecting Reed Switch with Arduino
The following image shows the circuit diagram of Interfacing Arduino and Reed Switch.
Components Required
Arduino UNO (any Arduino Board can be used) Reed Switch with Magnet (Normally Open type is used here) LED 1KΩ Resistor x 2 Connecting Wires Mini Breadboard USB Cable for Arduino
Code
Upload the following code to Arduino. If you have made any changes to the circuit (like the pins to which the Reed switch and LED are connected to), modify the code accordingly.
Working
I think the working of the project must be clear by now. Make the necessary connections and upload the above code to Arduino UNO. In the code, Arduino is programmed to always read the status of the Pin to which the Reed Switch is connected to. Since it is pulled HIGH, usually, the status of the Pin will be HIGH. But when a magnet is brought near the reed switch, the contacts get attracted and the pin becomes LOW. This transition will make the Arduino to turn ON the LED. If the magnet is moved away from the Reed Switch, the status of the pin will be once again HIGH and the LED is turned OFF.
Conclusion
A simple project-cum-tutorial on Reed Switch is explained here. Reed Switches can be used in a variety of applications like Door Monitoring Systems, Burglar Alarm Systems, Security Systems, Proximity Sensors, etc. Since a Reed Switch is dependent on presence or absence of a Magnetic field, it can be used as a Magnetic Sensor i.e. detects a magnetic field (additional circuitry and components might be required).
Comment * Name * Email * Website
Δ
![]()
![]()
![]()

![]()
![]()

