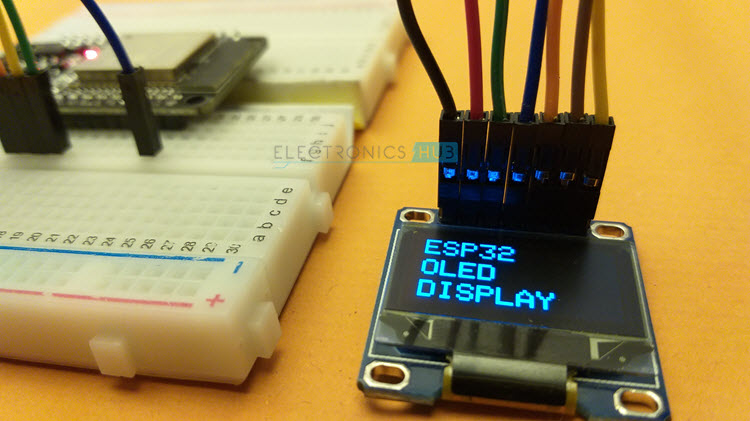
Introduction
OLED or Organic Light Emitting Diode is an advance display technology which uses a film of organic compound between two electrodes (anode and cathode) and when voltage is applied across the electrodes, the organic film emits light. The main advantage of an OLED Display is that it emits its own light and doesn’t need another source of backlight. Due to this, OLED Displays often have better contrast, brightness and viewing angles when compared to LCD displays. Another important feature of OLED Displays is deep black levels. Since each pixel emits its own light in an OLED Display, to produce black color, the individual pixel can be turned OFF.
A Brief Note on SSD1306 OLED Display
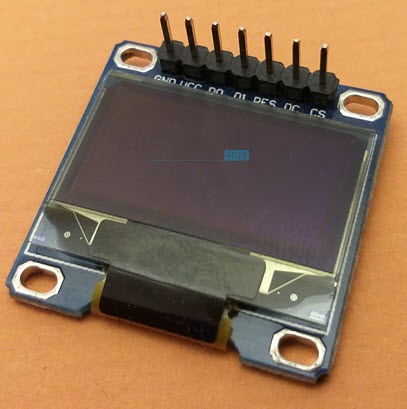
Do you want to use an OLED Display in your DIY Project? Do you want to display important information like IP Address, Web Server Address etc., on a display? Then the SSD1306 OLED Display Module is the perfect option.
This display module consists of a Monochrome OLED Display with a resolution of 128 pixels by 64 pixels. It measures 0.96” diagonally. This OLED Display is using the SSD1306 OLED Driver IC. SSD1306 OLED Displays have three types of communication interfaces:
8-bit 6800 Parallel Interface 3 or 4 wire SPI I2C
Of these, the I2C and SPI type OLEDs are very common. It is possible of change the configuration from SPI to I2C and vice-versa (you have solder / de-solder some SMD resistors). The model that I have is using 4-wire SPI Communication.
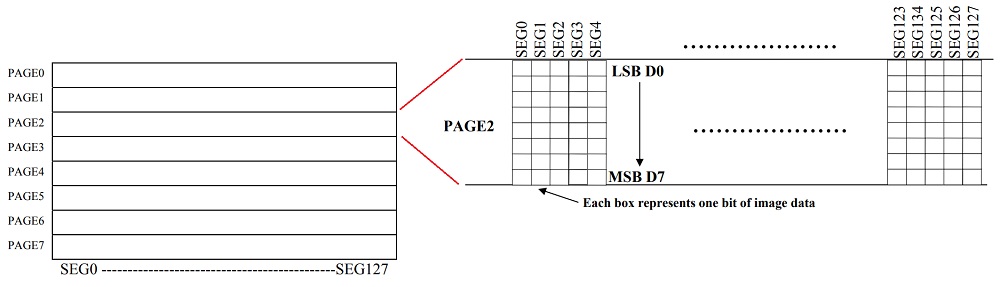
The SSD1306 OLED Driver IC has 128 x 64 bits Graphic Display Data RAM (GDDRAM). It is divided into eight pages (PAGE 0 to PAGE 7) and each page has 128 Segments. Again, each segment consists of 8-bits and each bit represents one pixel of the display. So, 8 Pages * 128 Segments * 8 Bits = 8192 Bits (1024 Bytes).
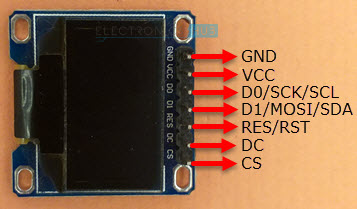
Pinout of OLED Display Module
The following table shows the Pinout of 7-pin SPI based OLED Display Module.
Power Supply
The SSD1306 OLED Driver IC runs on VDD = 1.65V to 3.3V and the actual OLED Panel runs on VCC = 7V to 15V. The OLED Display Module takes care of these wide ranges of voltage requirements with a charge pump circuit (for Panel) and regulator (for Driver IC) from a single power supply (usually between 3V and 5V). This makes the OLED Display Module to be connected to different boards like Arduino (with 5V logic) and ESP32 (with 3.3V logic).
ESP32 OLED Display Interface
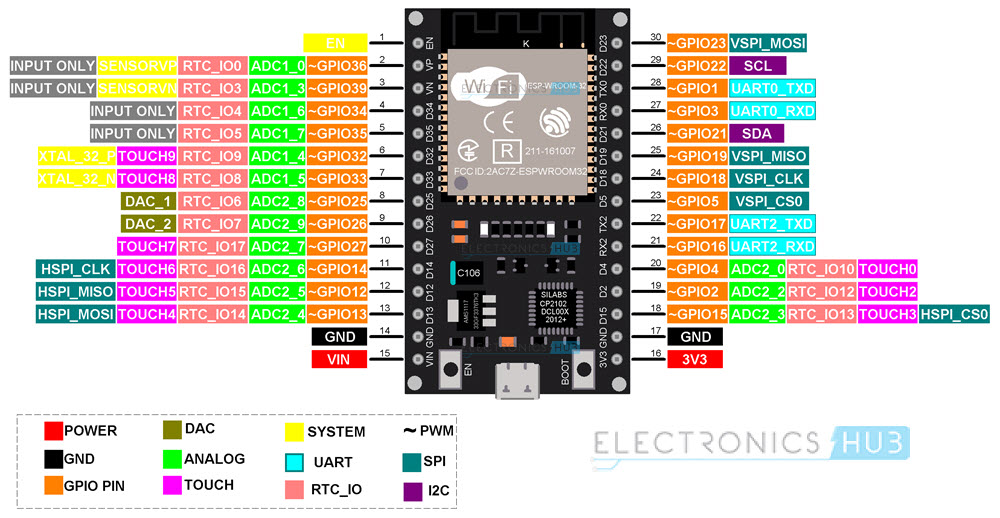
Let us now see how to interface an OLED Display with ESP32. First thing to understand is that the communication interface is SPI. So, look at the Pinout of ESP32 and identify the SPI Pins.
From the above image, HSPI and VSPI are available on ESP32 Development Board for SPI Interface. Let us use the VSPI peripheral. The pins for VSPI in ESP32 are: NOTE: ESP32 has totally 4 SPI Peripherals. (SPI0, SPI1, HSPI and VSPI). SPI0 is dedicated to SPI Flash IC. SPI1 shares the hardware with SPI0. This leaves HSPI and VSPI for interfacing SPI Devices. The following table shows the connections between ESP32 and OLED Display Module. In total, we have to make seven connections as this is an SPI OLED Display.
Components Required
ESP32 DevKit Development Board OLED Display Module Breadboard Connecting Wires Micro USB Cable
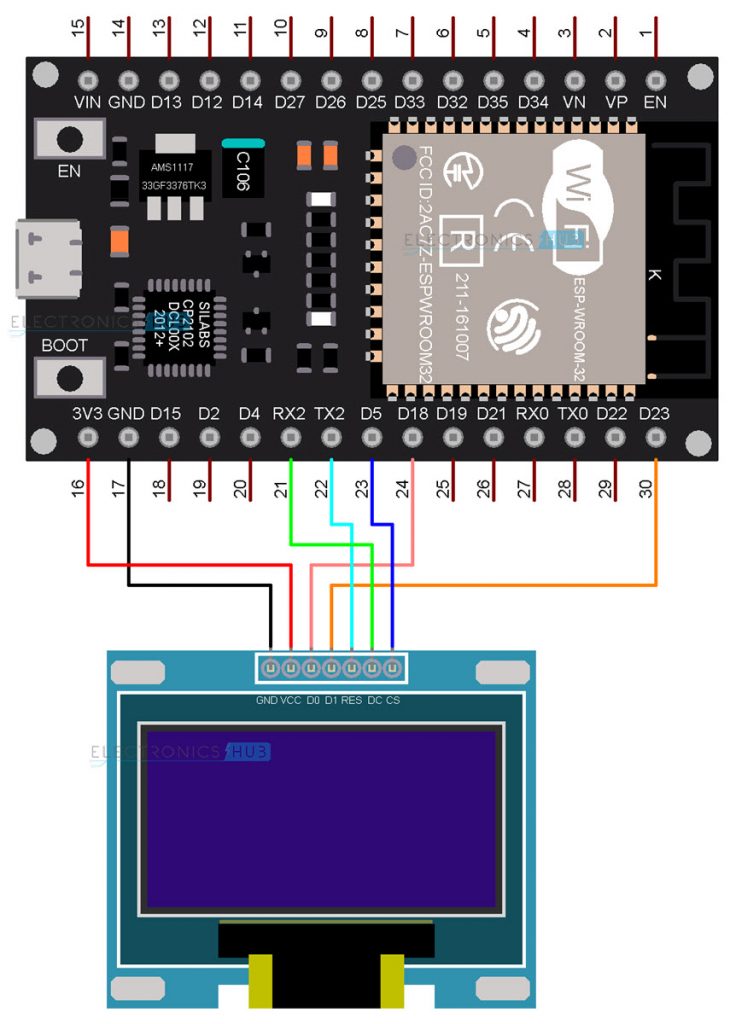
Circuit Diagram
The following image shows the circuit diagram for Interfacing SPI OLED Display with ESP32.
Preparing Arduino IDE
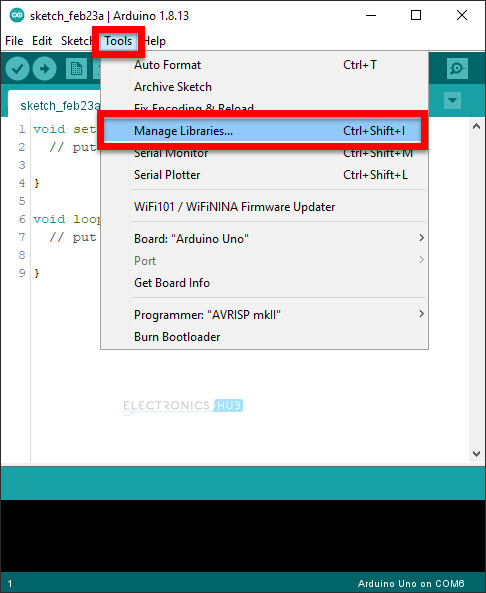
Before writing the code, you need to download some libraries for Arduino IDE related to SSD1306 OLED Display. I made a dedicated tutorial on how to install ESP32 Board in Arduino IDE. You can check out that tutorial first. Now, open the Arduino IDE and go to Tools -> Manage Libraries. . .
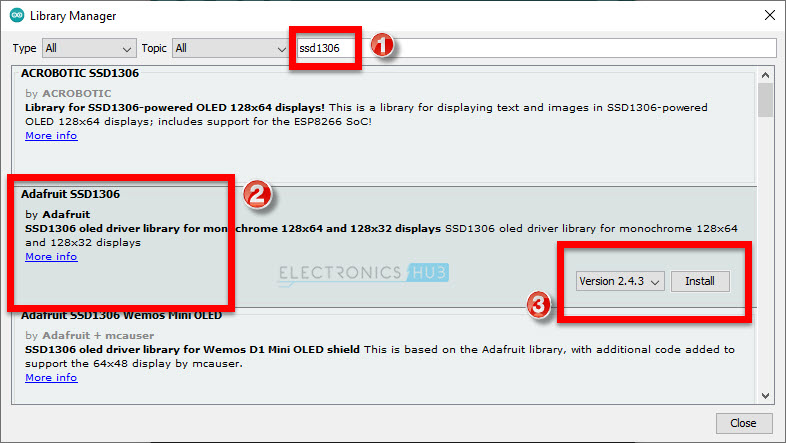
A Library Manager window will pop-up. In the search bar, type “ssd1306” and from the results select the “Adafruit SSD1306” option and click on install. This library is written specifically for monochrome OLED Displays based on SSD1306 Driver IC. The supported resolutions are 128 x 32 and 128 x 64.
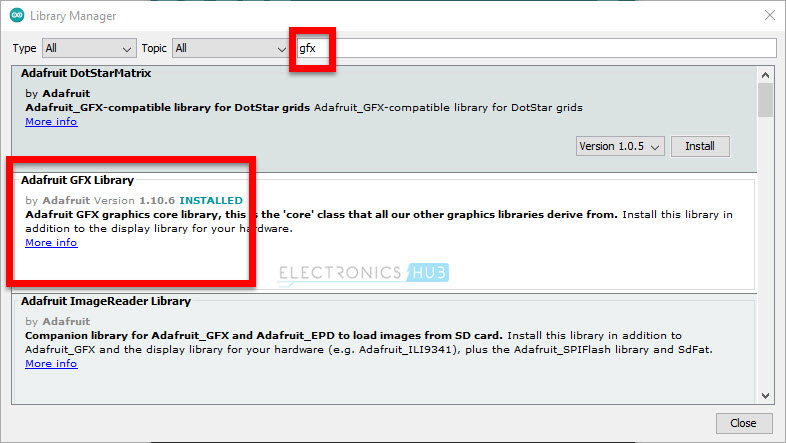
After installing SSD1306 Library, search for “gfx” and install “Adafruit GFX Library”. This is a graphics library by Adafruit for displaying basic graphics like lines, circles, rectangles etc.
Close the library manager window after downloading all the necessary libraries. Now, make sure that ESP32 Board is selected in Arduino IDE (Tools -> Board -> ESP32 Arduino -> ESP32 Dev Module).
Testing ESP32 OLED Display
After making all the necessary connections, we will now proceed to write a test code for ESP32 to display some text and graphics on the OLED Display. In this code, I am testing various features of the OLED Display like displaying normal text, inverted text, scrolling text, displaying ASCII Characters, setting font size. I also added the code for displaying graphics like rectangle, filled rectangle, rounded rectangle, filled rounded rectangle, circle, filled circle, triangle and filled triangle. Finally, I took the “Electronics Hub” logo and converted it into a bitmap and displayed it on the OLED Display.
Conclusion
A simple tutorial on how to interface SPI OLED Display Module with ESP32 DevKit Board. You learned the pinout of SSD1306 OLED Display, necessary connections for SPI Interface with ESP32, download libraries for Arduino IDE and display some text, graphics and image on the OLED Display using ESP32. thanks for reply! Comment * Name * Email * Website
Δ
![]()
![]()
![]()

![]()
![]()

