IMPORTANT NOTE: All the installation steps that I presented here are for Windows Operating System. If you are interested in learning the procedure for other operating systems like macOS and Linux, then I will try to add them.
Installing VS Code (Visual Studio Code)
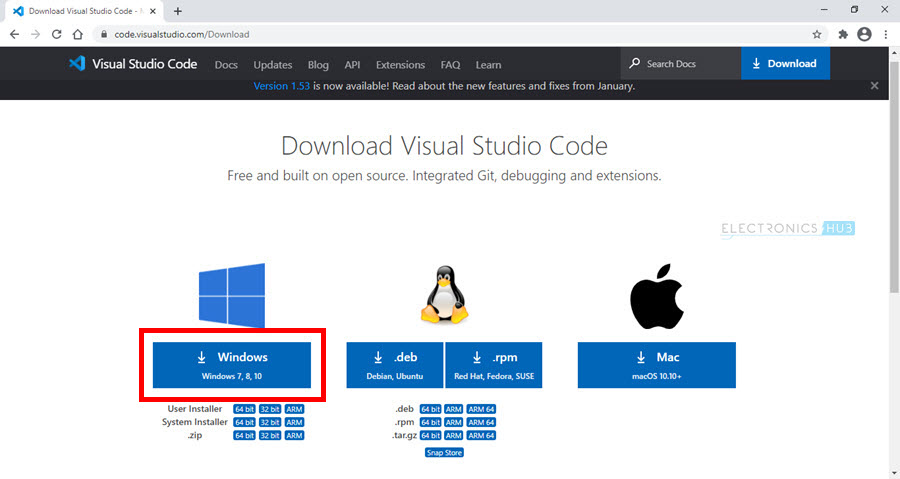
Visual Studio Code or simply (and popularly) known as VS Code, is a free and open-source Code Editor from Microsoft which runs on all the three major operating system platforms: Windows, Linux and MacOS. If you are a Software Developer, then VS Code is one of the best tools out there with support for different languages like C++, C#, Python, Java etc., and numerous extensions for keymaps, debuggers, code analysis tools etc. To download VS Code, go to “https://code.visualstudio.com/Download” and select the installer for your OS. I selected the Windows 64-bit installer and downloaded an executable called “VSCodeUserSetup-x64-1.53.0”. At the time of writing this tutorial, the latest (and stable) version of VS Codes was 1.53.0.
Double click on the downloaded executable to start the installation procedure. First, the license page pops up and you have to agree to the license terms.
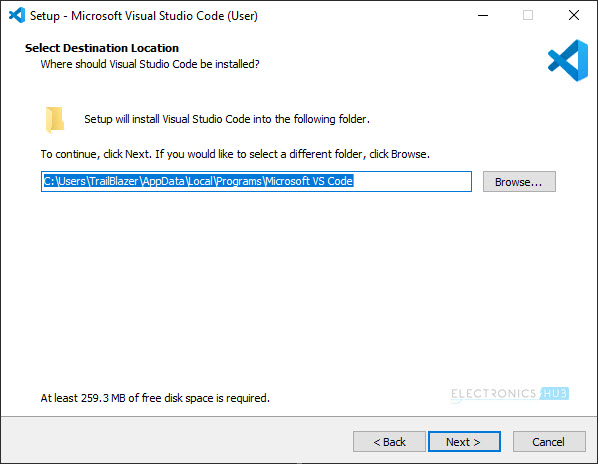
Click on next and on the next page, you can select the destination folder for the installation. I left it as default, which was “C:\Users\TraiBlazer\AppData\Local\Programs\Microsoft VS Code”. If you want to set a different location, you can change it here and then click on next.
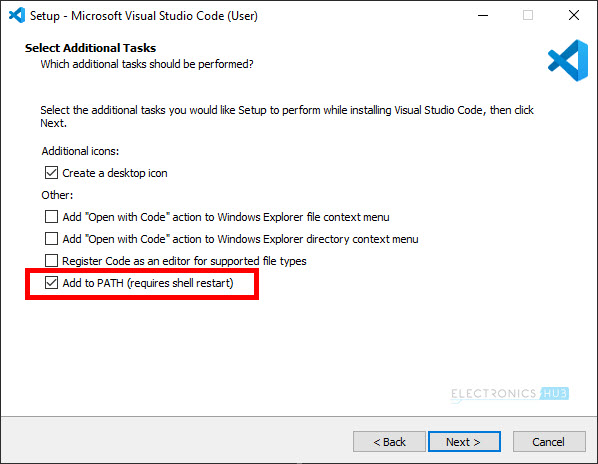
The next page allows you to add some additional tasks like adding desktop icon, adding actions to windows explorer and so on. I suggest you to check the “Add to PATH (requires shell restart)” option. You can also create a desktop icon if you want. Click on next after selecting the required options.
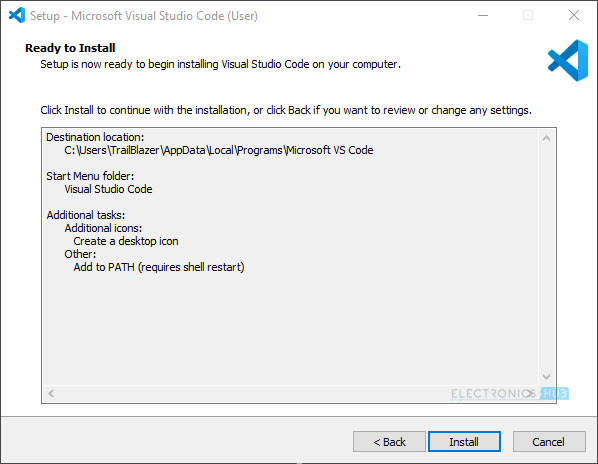
VS Code installer will confirm all the options you selected and if you want to modify any of them, then you can go back and make the changes. If not click on “Install” to begin installation.
Now, the installation of VS Code will start.
Once the installer completes the installation of VS Code, it will display a message saying “Setup has finished installing Visual Studio Code on your computer”. You can click on “Finish” to launch the VS Code App.
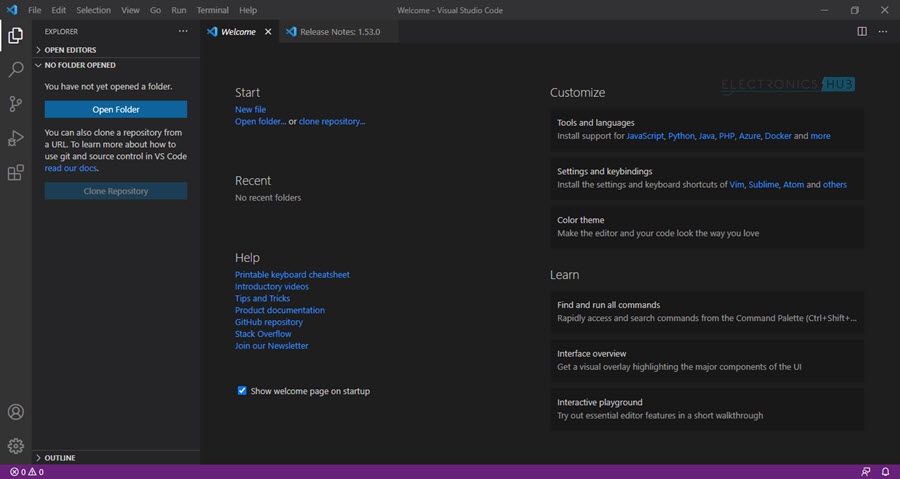
You have successfully installed Visual Studio Code and this is how the Home Screen looks like with a “Welcome” page. You can minimize or close the app for the time being.
Installing Python
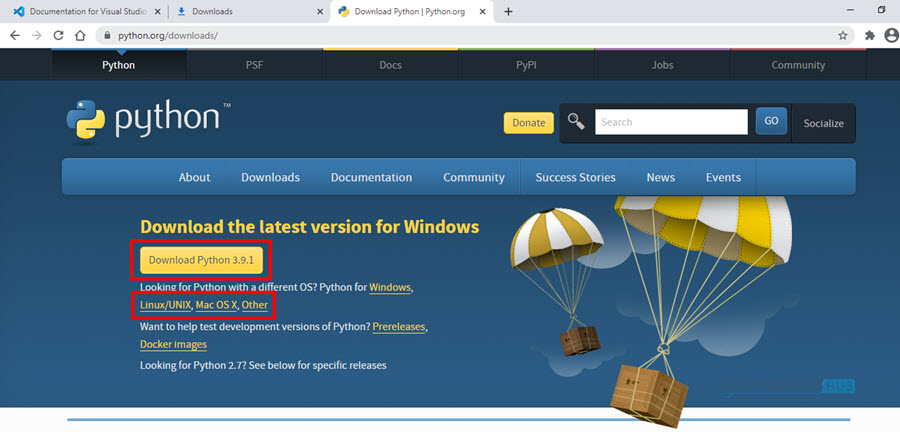
In order to program ESP8266 using VS Code and PlatformIO, you need to install Python in your computer. Well, this not entirely true. Your computer must have Python installed if you want to use the PlatformIO Core. As we are going to use the PlatformIO IDE Extension for Visual Code Studio, you don’t have to install Python exclusively. But none-the-less, will explain the steps to install Python on a Windows machine, just in case. Go to “https://www.python.org/downloads/” and click on “Download Python 3.9.1”. It will download the 64-bit executable for Windows. PlatformIO Core requires Python Version 3.5 or higher. At the time of writing this tutorial, the latest version of Python was 3.9.1. If you want to download for another OS, then select the appropriate OS mentioned in the download page.
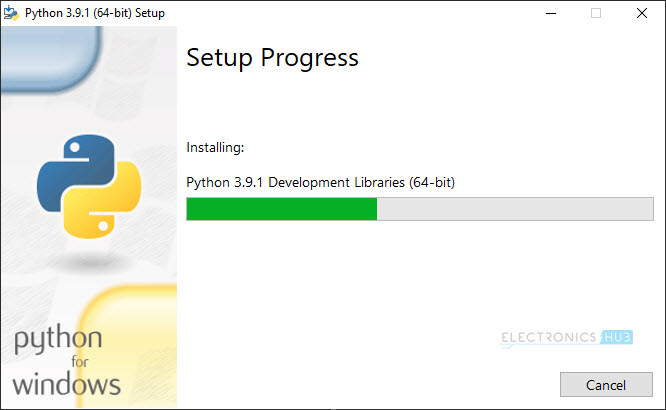
Double click on the executable file, which was “python-3.9.1-amd64” in my case to begin the installation procedure. In the first screen itself, you get a “Install Now” button. But before that make sure to check the “Add Python 3.9 to PATH” option at the bottom. Now you can click on the Install Now button.
This will initiate the initiate the installation process.
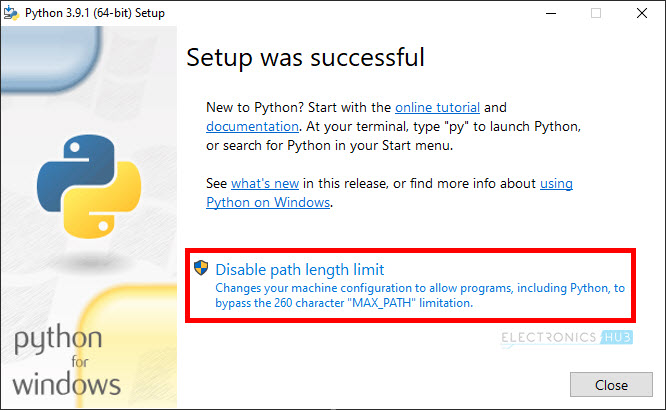
Once the Python installation is complete, you get a “Setup was successful” message. Optionally, if you want, you can disable the path length limit and then click on close.
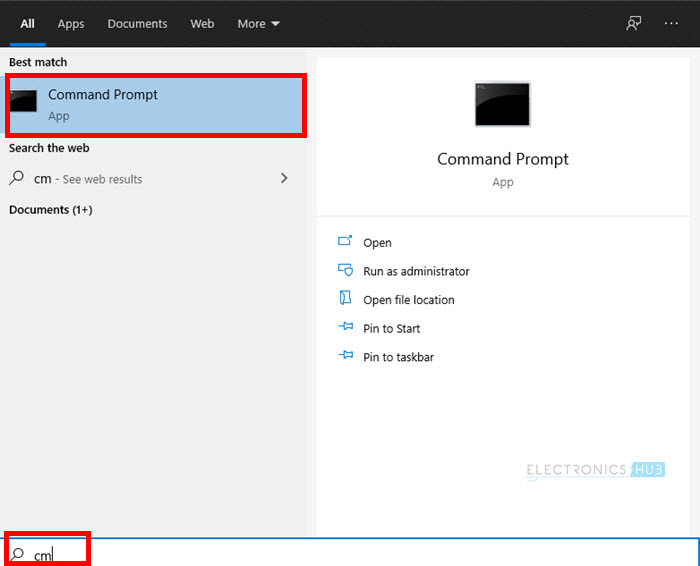
If you want to check whether Python was successfully installed in your computer, then click on Start in Windows and type “cmd” to search for Command Prompt. Click on the Command Prompt App.
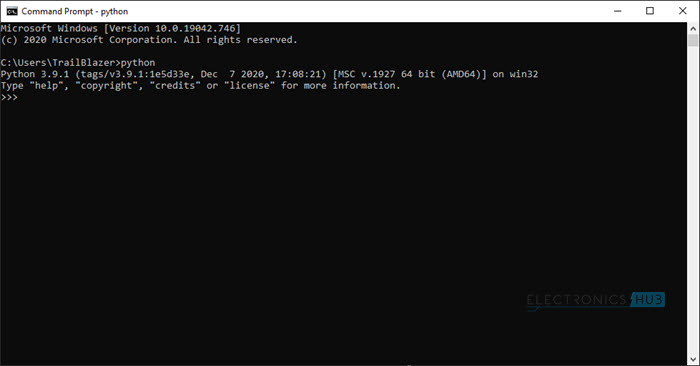
In the command prompt, just type python to initiate the interpreter. If Python was successfully installed as the path is successfully added, then you will get a response with the Python Version number and “»>”.
You successfully installed Python. NOTE: To exit the Python, click Ctrl+z and then hit enter.
Installing PlatformIO IDE Extension on VS Code
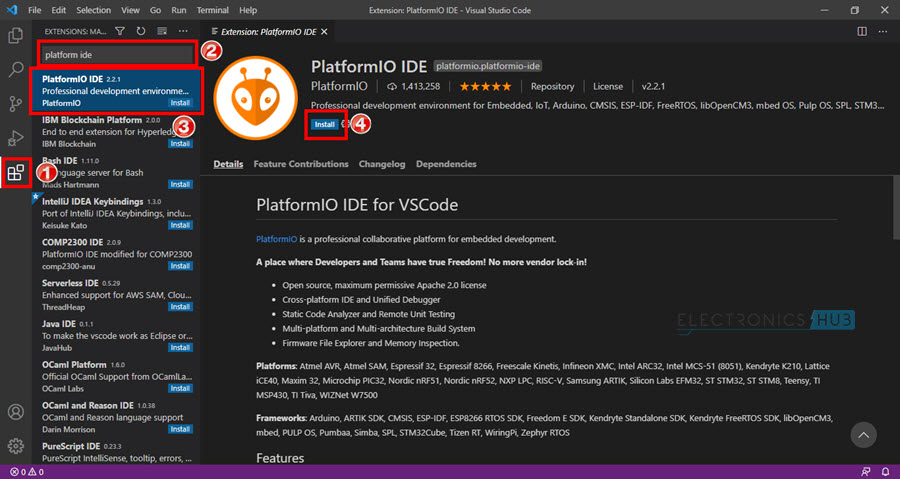
PlatformIO is professional tool for Embedded Software Developers. It is a cross-platform, cross-architecture IDE with support for different SDKs, debuggers, unit testing, static code analysis and many other features. It is a very useful tool for embedded engineers who work on different platforms for commercial products as it reduces the time-to-market. PlatformIO IDE is IoT focused integrated development environment that comes as an extension to many code editors and other development tools like Eclipse, Atom, Vim, Visual Studio and VS Code. As we are using the VS Code in our tutorial, let us see the steps for installing PlatformIO IDE in VS Code. First, open VS Code (if it is not already open). Select the 5th icon in the left side bar, which is a short cut to open Extensions. Now, in the search tab, type “platformio ide” and select PlatformIO IDE from the results. A new editor opens on the right related to PlatformIO IDE. Click on Install button.
At the time of this tutorial, the latest version of PlatformIO IDE was 2.2.1. You will get an Output window at the bottom saying “Installing PlatformIO IDE. . .”. Wait until it downloads and installs the necessary files.
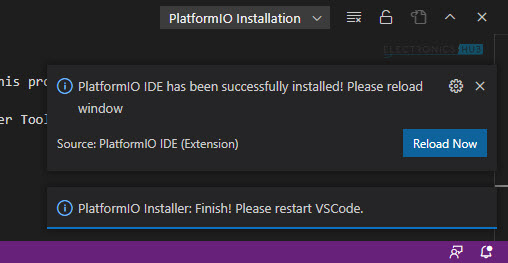
After few seconds, you will get a message saying “PlatformIO IDE has been successfully installed”. I strongly recommend you to click on “Reload Now” to reload the window and also restart VS Code.
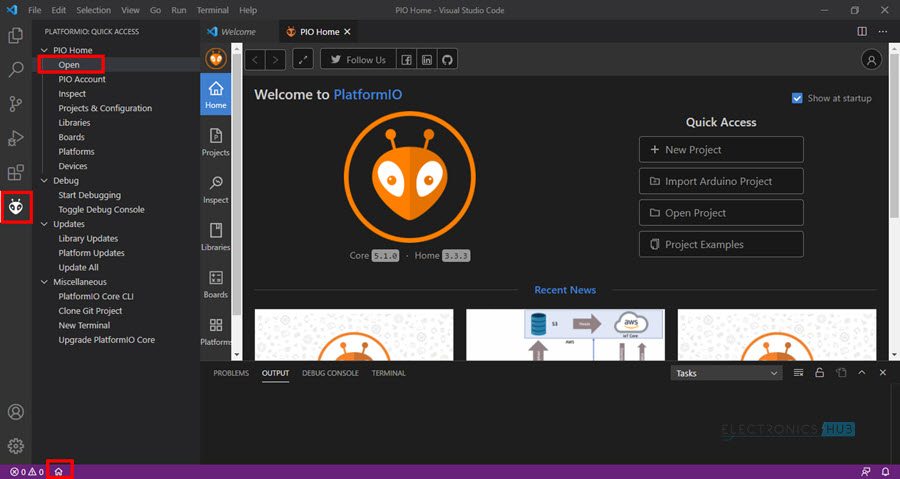
Once you restart the VS Code, you will get a new icon on the left side bar. This is the alien logo of PlatformIO IDE. Click on this icon and click on Open under PIO Home option to open the PlatformIO Home. Alternately, you can also click on the “Home” icon at the bottom status bar.
A Brief Overview of PlatformIO IDE
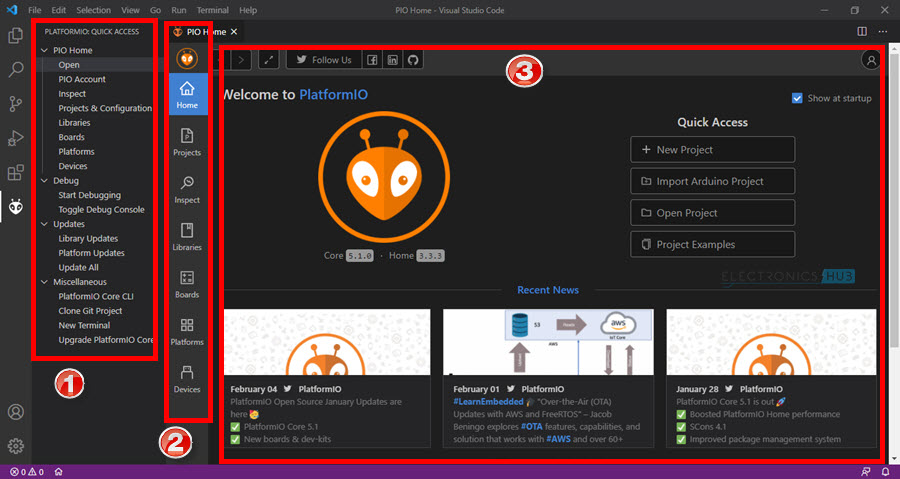
Now, let us understand the layout of PlatformIO IDE. The first is the PlatformIO Quick Access Panel on the left. This contains all the actions related to PlatformIO IDE like Boards, Devices, Debugging, Project related options like Build, Upload, Serial Monitor etc. The second is the shortcut icons on the PlatformIO Home like Home, Projects, Platforms, Devices etc. Finally, the last item is the actual editor itself.
How to Program ESP8266 using VS Code and PlatformIO?
Creating a New Project
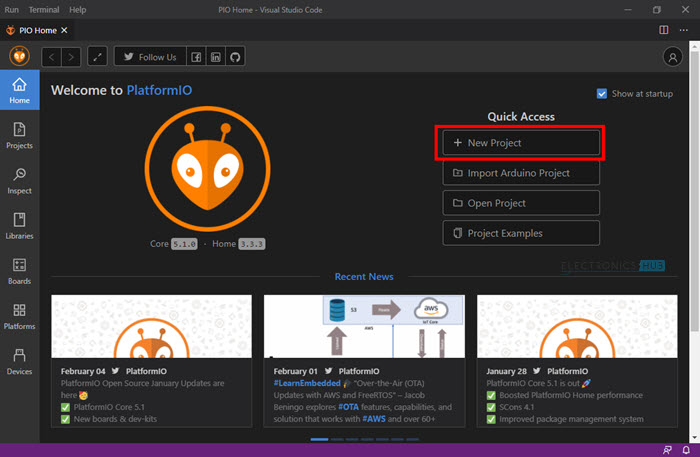
We have successfully installed VS Code and Platform IO on our computer. But the fun part i.e., the actual programming of ESP8266 using VS Code and PlatformIO hasn’t even begun yet. So, let’s proceed with that. First, in the PlatformIO Home (open it if it is not open already) click on “+ New Project” button on the right.
This will open a Project Wizard, where you can customize your project. First, provide an appropriate name to your project. I named it “PlatformIO_Demo”. Next is the board. PlatformIO supports over 960 boards from various manufacturers. As we are working with ESP8266 and that too NodeMCU version of it, select that board by typing NodeMCU.
You will get two options NodeMCU 0.9 (ESP-12) and NodeMCU 1.0 (ESP-12E). Select NodeMCU 1.0 (ESP-12E) as most newer boards are upgraded. Finally, the framework. Select Arduino framework and click on finish. The PlatformIO extension will now try to download all the necessary frameworks, SDKs, Toolchains required for your board. This is a time taking process and might be a couple of minutes. Sit back and wait.
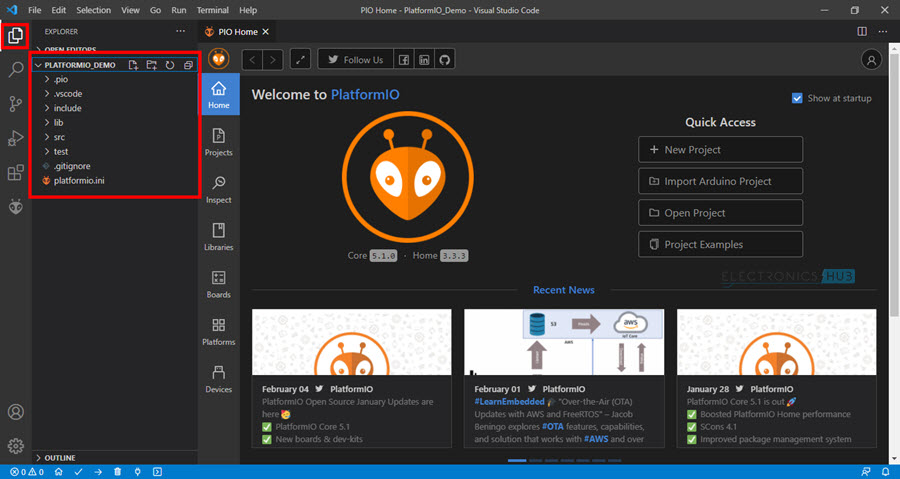
Once the files are downloaded and the project is setup, you will get a project explorer menu in the explorer tab on the left.
Structure of PlatformIO Project in VS Code
A typical PlatformIO Project consists of three main elements:
“lib” folder containing all the project specific libraries “src” folder containing all the source files “platformio.ini” file containing project configuration
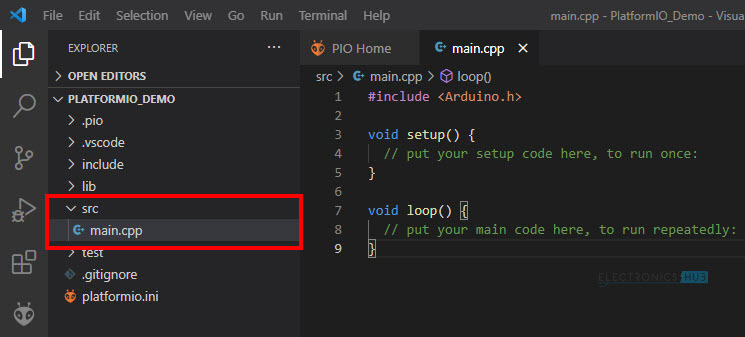
There are also other files and folders but these three are important. Your application code is written in “main.cpp” file in the src folder. This file contains the setup () and loop() functions of your Arduino sketch.
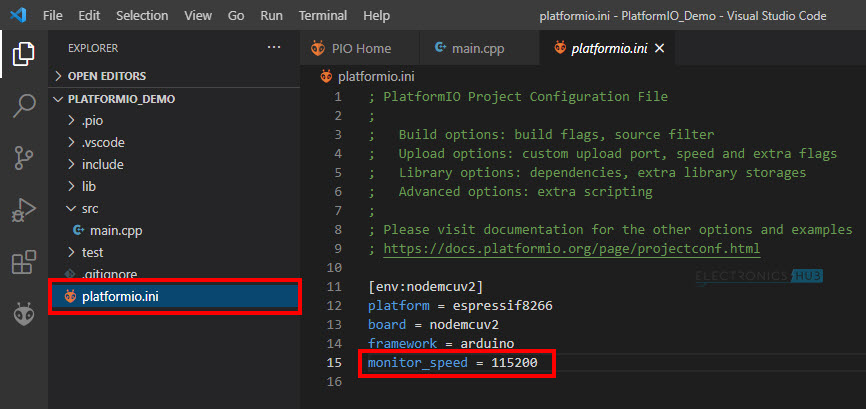
The platformio.ini is a Project Configuration File containing project related
Build options like build flags, source filter Upload options like custom upload port, speed and extra flags Library options like dependencies, extra library storages Advanced options like extra scripting
For our project, the platformio.ini file is initialized with the following:
platform = espressif8266 board = nodemcuv2 framework = arduino
WARNING: Do not delete platformio.ini file. Modify it if and only if you know what you are doing. This file is important for PlatformIO IDE to work properly. One possible modification to platformio.ini file you can perform is to add the baud rate for serial communication. By default, it is set to 9600. But ESP8266 boards, including NodeMCU works at 115200 baud rate. In order to change it, append the following line at the end of platformio.ini file and save the file (Ctrl+s).
Upload Program to ESP8266 NodeMCU using PlatformIO IDE
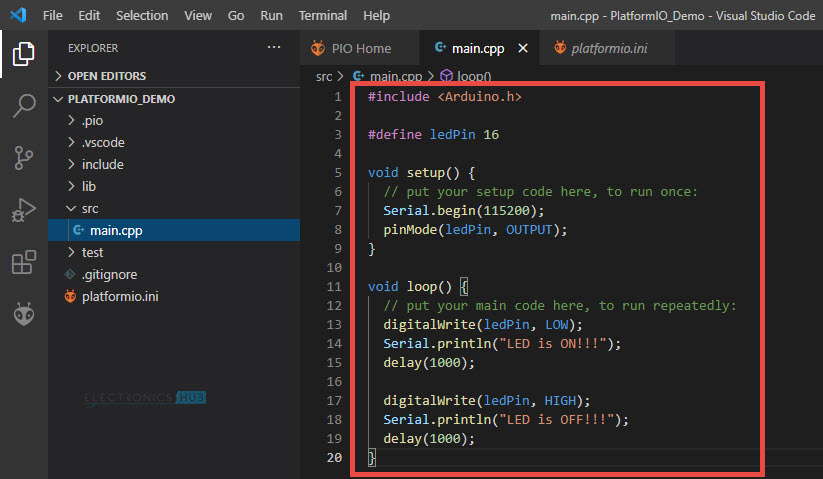
Open the main.cpp file from the src folder and modify the code with the following code.
IMPORTANT NOTE: You are required to include Arduino header file in the main source code (main.cpp) In this code, I am blinking the on-board LED connected to GPIO16. Also, using serial monitor, I am printing the status of the LED (just to test the Serial Monitor in PlatformIO IDE).
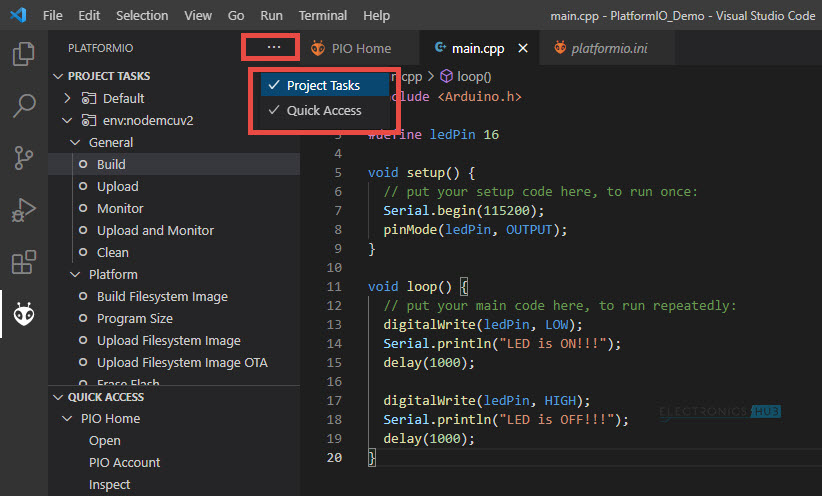
Instead of copying and pasting the above code, try to write the code as you can experience the VS Code Editor and how it helps in auto-filling and suggestions. After writing the code and saving it (Ctrl+s), open PlatformIO (by clicking on the PlatformIO icon on the left). A PROJECT TASKS will appear on the left. Expand the env:nodemcuv2 option and also the General tab. You can see project related options like Build, Upload, Monitor (to open Serial Monitor) etc. Click on “Build” option to compile the code and check for any errors.
If the PROJECT TASKS option is not visible, then click on three dots next to PLATFORMIO on the top and select PROJECT TASKS.
Another way to Build (or perform other project related options) is to use the PlatformIO shortcuts in the blue status bar in the bottom.
These shortcuts in the order are:
Home Build Upload Clean Serial Monitor New Terminal
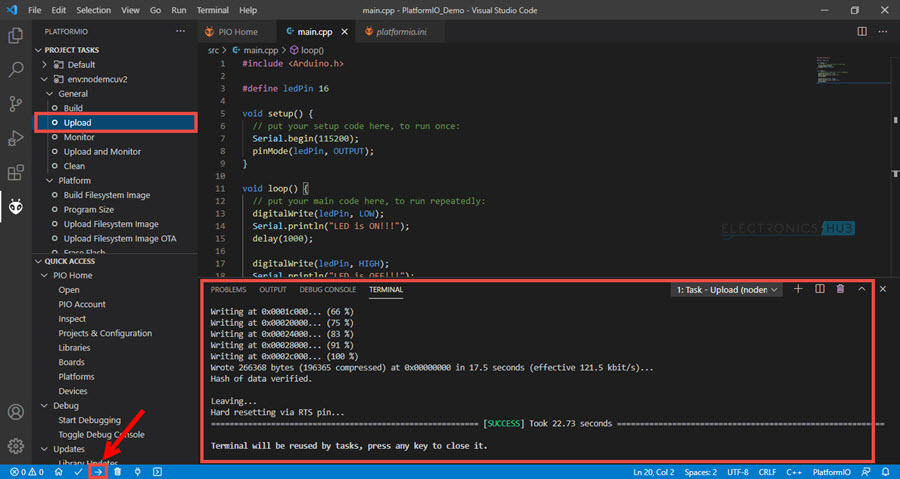
NOTE: The first two are Errors and Warnings. If you have not connected the ESP8266 NodeMCU board to the computer, then now is the time to do so. After connecting the board, you can upload the code either by clicking on the Upload shortcut at the bottom or from the PROJECT TASKS.
PlatformIO will once again compile the code, generate a binary file and upload the binary file to the flash memory. You can see the progress in the terminal. NOTE: If terminal is not open or you closed it and want to open it again, then in the menu bar, click on Terminal select New Terminal option. You can also use the shortcut at the bottom.
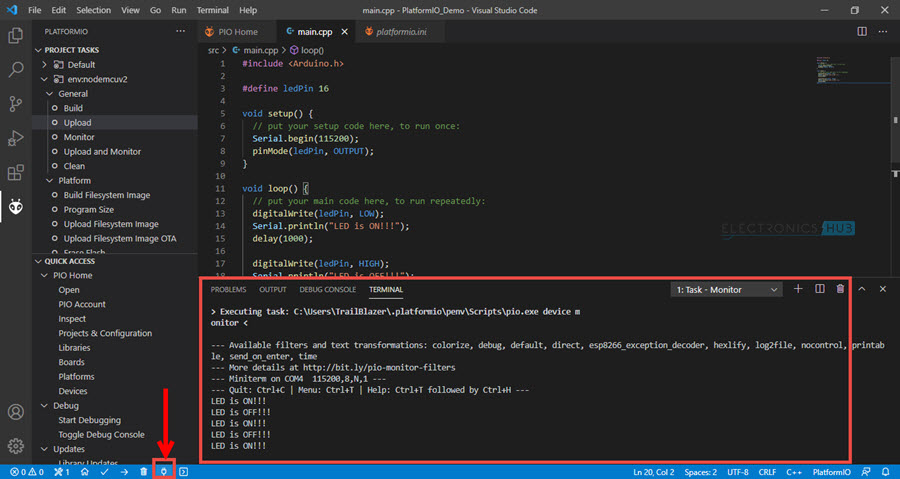
Serial Monitor
In our program, we set the board to print out the status of the LED to the Serial Monitor. Click on the shortcut at the bottom or select Monitor from the PROJECT TASKS option on the left to open serial monitor.
NOTE: If you haven’t changed the baud rate in platformio.ini file, change it to 115200. After making changes, restart the terminal to see the output.
Additional Information
In Arduino IDE, you have to set the COM port of the board to successfully upload the program. But PlatformIO IDE will automatically take care of COM port. You can check the COM port by going to PIO Home editor and selecting the Devices icon on the bottom.
Additionally, you can manually set the COM port by appending “upload_port = COM#” to the platformio.ini file.
Conclusion
This is a complete step-by-step tutorial on how to program ESP8266 using VS Code and PlatformIO IDE extension. You learned all the steps related to installing VS Code and PlatformIO, creating a new project and configuring PlatformIO for your project and also uploading the code to NodeMCU board. Comment * Name * Email * Website
Δ
![]()
![]()
![]()


![]()
![]()

